自定义Font Icon
前段时间在《@font-face制作Web Icon》一文收集了三种webfont通过CSS3的@font-face来制作Icon图标。现在在网上最为流行的是@robmadole和@supercodepoet两位大师制作的Font Awesome:
两位大师给大家准备近两百种不同的Icon图标,都是使用@font-face应用自定义的字体实现的。但有一个不足之处,有很多图标,我们无法使用字符或者实体符来识别,如果需要使用,只能把所有标签都应用,有时我们只需要一两个,而使用这么一个庞大的字符系统,好像有点不太划算。那么今天我要给大家介绍的是使用网络工具Fontomas自定义需要的font icon图标。
Fontomas为我们提供了四种不同的字体来制作Icon图标:
Fontomas为大家提供的四种字体都是以svg的格式,我们可以下载所需的字体,通过FontSquirrel或者OnlineFontconverter工具来帮助我们转换成所需的字体。下面我们就一起来看看如何得到所需的svg字体,并如何转换成字体。
第一步:打开Fontomas
要制作,必须要保证你那连网了,并且能正常登录到Fontomas网站。进入后你能看到下面这样的页面:
上面显示的是其中一种字体,下面还有其他三种字体,这些我们并不是非常关心,因为知道一种的做法,就知道其他的做法。我们关键来看上面的两个部分:

我们要用到的就是上图的两个部分,第一个部分告诉我们要先做什么,后做什么。而第二部分可以帮助我们设置icon的大小,如果你有font icon字体,你也可以上传,并定制。那么我们就按现成的来做吧。
第二步:选择需要的Icon
这步其实很简单,你可以在所需要的字体范围内选择你需要的icon。

你选中后,第二步的“Rearrange”会告诉你选中多少个icon,如上图所示。
第三步:获取字符号或实体符编辑
接下来点击蓝色导航中的“Rearrange”,我们就可以获取刚才选择的“14”个Icon相对应的“字符号”或者“实体符编码”:

第四步:获取svg字体以及字符号的编码
接下来这一步是关键的一步,点击“Save Font”我们就可以得到刚才选中的字符的svg字体以及对应的字符编码,并且需要下载到本地来:

并把对应的编码copy下来:

第五步:转换字体
这一步也是关键的一步,刚才我们得到的仅是“svg”字体,但有些浏览器并不支持这种字体(详细的参见@font-face),所以我们还需要借助工具将其转换成所需的字体,我习惯使用FontSquirrel工具。详细的转换请参考@font-face。此处我们只看看几张截图,帮助大家理解如何得到自己需的字体:
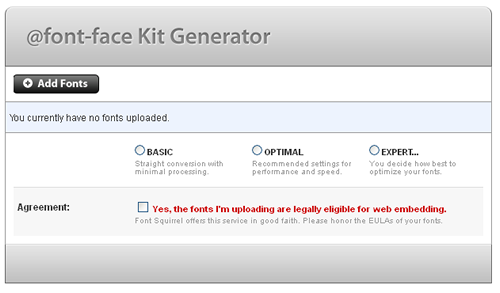
打开工个界面:

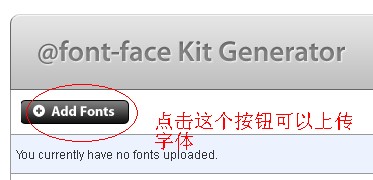
添加字体:

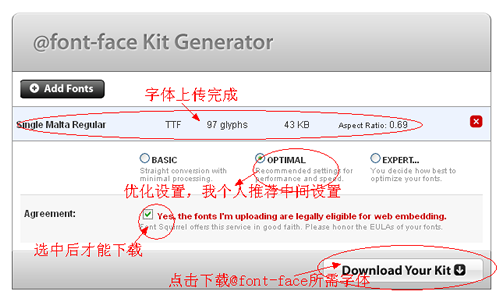
转换字体:

字体转换过来了,我们就可以正常使用了。下面提供这四种字体的全部代码:
@font-face调用转用的字体:
	/*Entypo font*/
@font-face {
    font-family: 'FontomasEmtypo';
    src: url('entypo/fontomas-webfont.eot');
    src: url('entypo/fontomas-webfont.eot?#iefix') format('embedded-opentype'),
         url('entypo/fontomas-webfont.woff') format('woff'),
         url('entypo/fontomas-webfont.ttf') format('truetype'),
         url('entypo/fontomas-webfont.svg#FontomasCustomRegular') format('svg');
    font-weight: normal;
    font-style: normal;
}
/*IconicFill font*/
@font-face {
    font-family: 'FontomasIconicFill';
    src: url('iconicfill/fontomas-webfont.eot');
    src: url('iconicfill/fontomas-webfont.eot?#iefix') format('embedded-opentype'),
         url('iconicfill/fontomas-webfont.woff') format('woff'),
         url('iconicfill/fontomas-webfont.ttf') format('truetype'),
         url('iconicfill/fontomas-webfont.svg#FontomasCustomRegular') format('svg');
    font-weight: normal;
    font-style: normal;
}
/*IconicStroke Font*/
@font-face {
    font-family: 'FontomasIconicStroke';
    src: url('iconicstroke/fontomas-webfont.eot');
    src: url('iconicstroke/fontomas-webfont.eot?#iefix') format('embedded-opentype'),
         url('iconicstroke/fontomas-webfont.woff') format('woff'),
         url('iconicstroke/fontomas-webfont.ttf') format('truetype'),
         url('iconicstroke/fontomas-webfont.svg#FontomasCustomRegular') format('svg');
    font-weight: normal;
    font-style: normal;
}
/*WebSymbolsRegular Font*/
@font-face {
    font-family: 'FontomasWebSymbolsRegular';
    src: url('websymbolsregular/fontomas-webfont.eot');
    src: url('websymbolsregular/fontomas-webfont.eot?#iefix') format('embedded-opentype'),
         url('websymbolsregular/fontomas-webfont.woff') format('woff'),
         url('websymbolsregular/fontomas-webfont.ttf') format('truetype'),
         url('websymbolsregular/fontomas-webfont.svg#FontomasCustomRegular') format('svg');
    font-weight: normal;
    font-style: normal;

}
下面我们来看一个简单的详细运用:
HTML Markup
<div class="box"> <span class="key">!</span> <span class="fontomas"> ! </span> <span class="hex"> ! </span> <span class="cssContent">content:'!'</span> </div>
在“.fontomas”上调用上面定义的font:
.fontomas {
  font-family: 'FontomasEmtypo';
}
此时将显示为:

上面只是简单的介绍了其中几种字符的icon的调用,你可以按上面的方法尝试其他的字符制作,我在这里整理了他们四种字符的所有icon的demo,有兴趣的同学可以点击这里。并且可以点击下载,获取相应的字体以及对应的就用编码。
下面附上对应字符的编码:


更详细的编码对照表可以点击这里。
上面介绍的只是如何自定义自己所需的字体来制作字符icon,当然大家得到自己的font icon后,完全可以对其进行更多的扩展制作,比如说类似于Font Awesome。有兴趣的同学自己可以去一试。
那么有关于自定义font icon就说到这里了,希望上面的方法对大家有所帮助。如果你有更好的方法或更好的资源可以一起分享。
如需转载烦请注明出处:W3CPLUS

